Discover the Magic of Easy 3-Ingredient Dairy-Free Coconut Whipped Cream
Imagine a light, airy, and utterly delicious topping that transforms any dessert into a gourmet delight, all while being completely dairy-free. Sound too good to be true? Not with this incredible easy coconut whipped cream recipe! For anyone navigating a dairy-free lifestyle, embracing a vegan diet, or simply seeking a healthier, additive-free alternative, this simple creation is nothing short of a culinary revelation. It has saved countless desserts, elevated morning coffees, and added a touch of effortless elegance to everything from fruit salads to holiday pies. The best part? You only need three ingredients (or even just two!) and a mere five minutes of active preparation to achieve this luscious, fluffy miracle.
I first discovered the wonders of coconut whipped cream years ago, and it quickly became a staple in my kitchen. It's truly a game-changer, turning a humble can of full-fat coconut milk into a cloud of whipped perfection. Once you experience the joy of making this at home, you'll likely never look back at store-bought versions again. Prepare to impress yourself and your guests with this simple yet sophisticated treat!
Why You'll Fall in Love with This Easy Dairy-Free Delight
This isn't just any whipped cream; it's a kitchen essential that promises convenience, versatility, and pure indulgence. Here’s why this easy coconut whipped cream will become your new favorite:
- Dairy-Free Dream Come True: Whether you're vegan, lactose intolerant, or simply reducing dairy, this whipped cream delivers the exact same dreamy texture and satisfying richness as its traditional counterpart, without any compromise. It’s a guilt-free pleasure everyone can enjoy.
- Quick as Can Be: In a world where time is precious, this recipe shines. With just 5 minutes of active preparation (plus essential chilling time), you can whip up a batch whenever a craving strikes or an unexpected dessert needs a finishing touch. No fancy culinary skills are required!
- Endlessly Versatile: From casual fruit bowls to elaborate layer cakes, this coconut whipped cream is a true chameleon. It pairs beautifully with fresh berries, decadent chocolate desserts, warm apple pies, pumpkin spice lattes, a dollop on hot cocoa, or even as a creamy element in a breakfast parfait. Your culinary imagination is the only limit!
- Naturally Better for You: Unlike many store-bought whipped toppings filled with artificial flavors, preservatives, and questionable additives, our homemade version uses minimal, natural ingredients. You know exactly what’s going into your body, making it a healthier and more wholesome choice.
- Customizable Sweetness: Tailor the sweetness to your exact preference. Add more or less sugar, or omit it entirely for a truly unsweetened, rich coconut cream. You can even experiment with natural sweeteners like a touch of maple syrup or a few drops of stevia, though powdered sugar generally yields the best texture.
It's like having a pastry chef's secret up your sleeve, ready to elevate everyday moments and special occasions alike.
The Secret to Perfect Easy Coconut Whipped Cream: Ingredients & Equipment
The magic of this recipe lies in its simplicity, relying on just a few key components. Choosing the right ingredients and having the proper tools will guarantee success.
Essential Ingredients:
- 1 can (13.5 oz / 400ml) Full-Fat Coconut Milk or Coconut Cream: This is the star of our show! Do not use light coconut milk, as it lacks the fat content needed to whip into stiff peaks. For optimal results, ensure your coconut milk has a high-fat percentage (around 60-65% coconut extract or higher is ideal) and minimal stabilizers if possible. Some brands are far superior to others for whipping – more on that below!
- 1-2 tablespoons Powdered Sugar (Confectioners' Sugar): This is our preferred sweetener. Powdered sugar dissolves easily and helps stabilize the whipped cream, giving it a smooth, fluffy texture. You can adjust the amount to your taste or omit it entirely for an unsweetened version.
- ½ teaspoon Vanilla Extract (Optional, but highly recommended): A dash of vanilla elevates the flavor profile, adding warmth and a classic sweetness that complements the coconut beautifully.
Essential Equipment:
- Mixing Bowl: A large, chilled mixing bowl is crucial. Metal bowls work exceptionally well because they retain cold temperatures, which is beneficial for whipping. Pop it in the fridge or freezer for 10-15 minutes before you start.
- Electric Mixer (Hand or Stand Mixer) or Whisk: While a sturdy whisk and a strong arm can get the job done, an electric hand mixer or a stand mixer with a whisk attachment will make the process much faster and easier, yielding consistently fluffy results.
- Rubber Spatula: For scraping down the sides of the bowl and folding in ingredients.
The quality of your coconut milk truly makes all the difference. While many brands exist, some contain too much water or too many emulsifiers that prevent proper whipping. For an in-depth guide on selecting the best options, check out our dedicated article: Best Coconut Milk for Whipped Cream: Top Brands Tested & Ranked.
Step-by-Step Guide to Your Easy Coconut Whipped Cream
Ready to create this dairy-free masterpiece? Follow these simple steps for perfect results every time.
- Chill Your Coconut Milk (Crucial Step!): Place your can of full-fat coconut milk (unopened) in the refrigerator for at least 8-12 hours, or ideally, overnight. This step is vital! Chilling allows the thick, creamy coconut fat to separate from the clear coconut water and harden at the top of the can. Do not chill in the freezer for extended periods, as it can crystalize the fat unevenly, making it difficult to whip properly.
- Chill Your Bowl & Beaters: For the fluffiest whipped cream, place your mixing bowl (especially if metal) and your mixer beaters (if using an electric mixer) in the refrigerator or freezer for 10-15 minutes before you begin. Cold tools help keep the coconut fat firm, promoting better whipping.
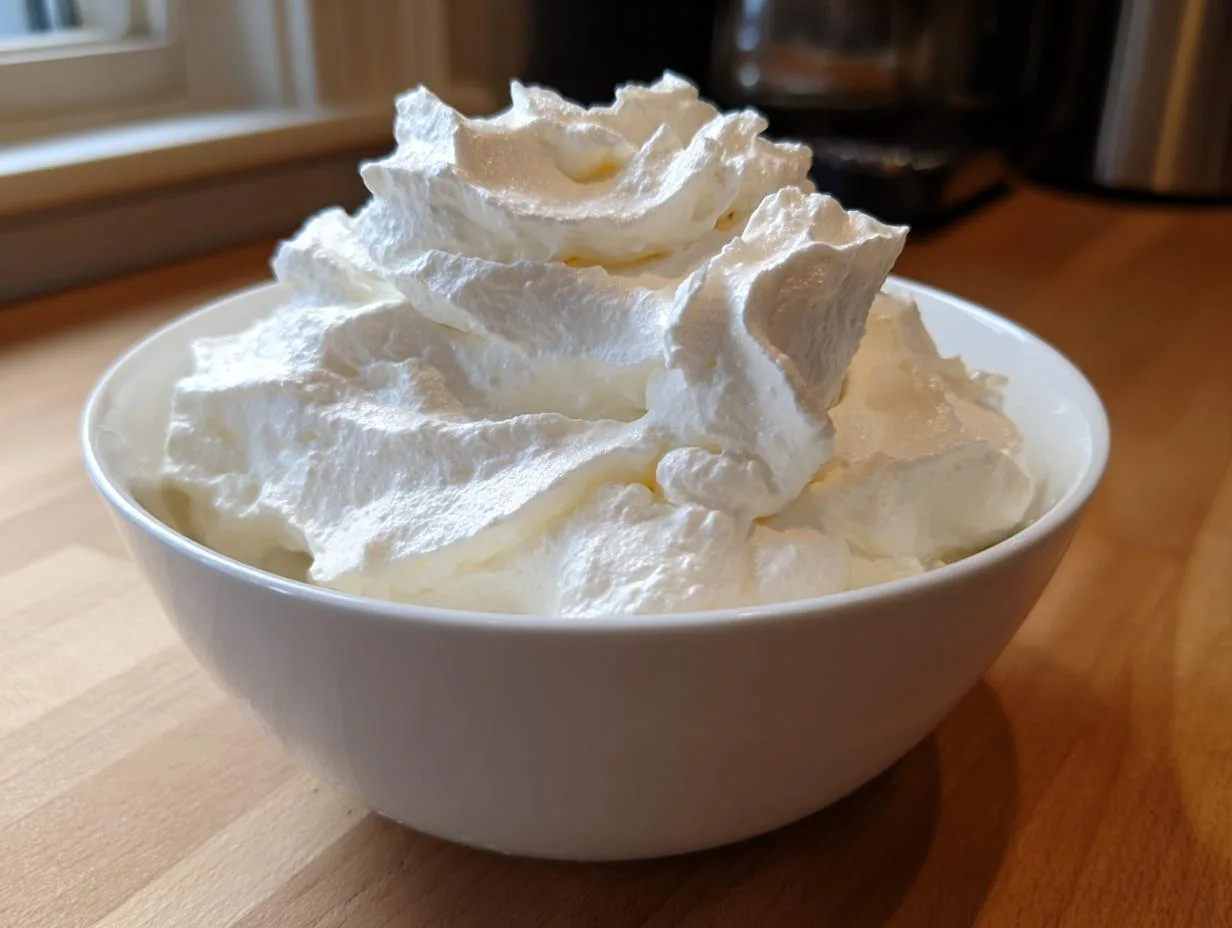
- Scoop Out the Cream: Carefully open the chilled can of coconut milk without shaking it. You should see a thick, solid layer of coconut cream at the top. Gently scoop out *only* this hardened cream into your chilled mixing bowl, leaving any clear coconut water behind. Reserve the coconut water for smoothies, curries, or other recipes – don't discard it!
- Whip Until Fluffy: Using your electric mixer (or whisk), begin whipping the solid coconut cream on medium speed. At first, it will look lumpy and somewhat grainy. Continue whipping, gradually increasing the speed to medium-high. As you whip, the cream will become smooth, then light and airy. Keep whipping until soft peaks form, then continue until it reaches a consistency similar to traditional whipped cream – fluffy and holding its shape. This usually takes about 3-5 minutes with an electric mixer. For a comprehensive guide to achieving the perfect consistency, refer to our article on Master Vegan Coconut Whipped Cream: 5-Minute Dessert Topping.
- Sweeten and Flavor (Optional): Once your coconut cream is whipped to your desired consistency, add the powdered sugar and vanilla extract (if using). Continue to whip on low speed for another 30 seconds to a minute, just until the sugar is incorporated and the cream is smooth. Taste and adjust sweetness if needed.
- Serve Immediately or Store: Your easy coconut whipped cream is now ready to enjoy!
Troubleshooting Common Coconut Whipped Cream Issues
While this recipe is simple, sometimes things don't go exactly as planned. Here are solutions to common problems:
- My whipped cream is too liquidy and won't whip!
- Solution: The most common culprit is insufficient chilling time for the coconut milk. It needs to be very cold for the fat to solidify. Another reason could be using light coconut milk, not separating enough of the clear liquid, or trying to whip in a warm environment. Try putting the bowl back in the fridge for 30 minutes and re-whipping. If it's still too liquid, you might need a different can of coconut milk.
- My whipped cream is grainy or lumpy.
- Solution: Some brands of coconut milk naturally have a slightly grainier texture. Whipping for too long can sometimes "break" the cream, making it grainy. Try to whip just until soft peaks form. If it's already grainy, you can sometimes smooth it out a bit by adding a tiny splash of the reserved coconut water (just a teaspoon at a time) and mixing gently.
- It just isn't getting fluffy.
- Solution: Ensure you're using full-fat coconut milk and that it's thoroughly chilled. Also, make sure you've scooped out *only* the solid cream, leaving all the liquid behind. Cold equipment (bowl and beaters) also helps immensely.
Storage Tips
Homemade coconut whipped cream is best enjoyed fresh. However, if you have leftovers, store it in an airtight container in the refrigerator for up to 3-5 days. It may firm up slightly when chilled, so give it a quick whisk before serving again to restore its fluffy texture.
Whip Up a Dairy-Free Dream Today!
There you have it – the ultimate guide to creating luscious, dairy-free easy coconut whipped cream with just three simple ingredients. This versatile topping is a testament to how simple ingredients can create truly magical results. Whether you’re vegan, have dietary restrictions, or are just curious to try a delightful new recipe, this coconut whipped cream is sure to become a cherished addition to your culinary repertoire. So go ahead, grab a can of full-fat coconut milk, chill it overnight, and prepare to whip up a dairy-free dream that will elevate your desserts and impress everyone who tastes it!
